| Added | Sun, 18/12/2016 |
| Источники |
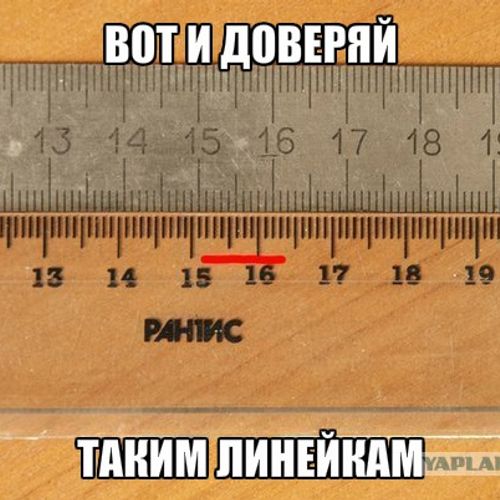
- Petya devices?
- 20!
- That "20"?
- And what "instruments"?
(Joke)
All devices are divided into devices for evaluation and test devices for accurate measurement.
Device accurate measurement is the measuring device, i.e. the device is entered in the State register of measuring instruments having a verification certificate.
Measuring device - a measurement means intended to receive values of measured physical quantities in the prescribed range.
Typically the measuring device includes a display device for converting the measurand into a form available for direct perception by an observer.
Measuring instruments are divided into:
- indicating and recording;
- integrating and summing;
- instruments of direct action and instruments of comparison.
For measuring devices, characterized by the following set of parameters:
Measurement range — the range of values measured values expected by the device during its normal operation (with specified measurement accuracy).
Threshold — a certain minimum or threshold value of the measurand that the device can distinguish.
The sensitivity relates the value of the measured parameter with a corresponding change of the readings.
Accuracy — the ability of the instrument to indicate the true value of the measured value (allowable limit of error or uncertainty of measurement).
Stability — the ability of the instrument to maintain measurement accuracy within a certain time after calibration.
In addition, for every measuring device there is a set of characteristics specific to the area of technology where this device is used.
All of these characteristics are not only the manufacturer of the device in the corresponding documentation, but also confirmed during the certification of the device. If successful, the device is entered in the State register of measuring instruments, where he starts a special document (description of the type of measuring), the manufacturer is issued a certificate. The certificate can be specified or the validity of, or a list of serial numbers to which it applies. The devices released after the end of the validity period of the certificate, or not included in the list of numbers in it above, cannot be considered a measurement. Thus, if the manufacturer wants to produce appliances after expiry of the certificate, he must undergo the certification process again.
In addition, usually to compensate for the departure of the parameters used in the instrument components over time measuring devices undergo a special periodic calibration procedure and evidence of the claimed characteristics – calibration. The period of calibration and methods described by the manufacturer of the device in the relevant operational documentation. Successful completion of calibration is confirmed by the verification certificate of the established sample in which the date of calibration, the validity period of the certificate and the serial number of the attorney of the instrument.
For complex instruments, the developer shall also provide the measurement procedure (MVI) is a document that describes the sequence of actions to be performed by the operator to produce a result with a given accuracy. This technique also is certified, as evidenced by the appropriate certificate.
For the procedures of certification and verification of the measuring instrument (and, if necessary, certification of MVI) requires equipment with an accuracy that is at least three times (and ideally on the order of magnitude) higher than the stated manufacturer accuracy check settings. In addition, in accordance with applicable law, to these procedures is mandatory is involved (of course, on a commercial basis) a third party licensed to the certification and verification of measuring instruments of this type.
For the above reasons, as a rule, the instrumentation of roads, cumbersome and have significant limitations on the operating conditions (temperature, ambient humidity, etc.). However, in accordance with applicable law and accepted by the scientific community standards, only the testimony of certified and calibrated instruments have the legal and scientific power.
Device for evaluation test is designed to provide an estimate of the value of the measured physical quantity. Typically, these devices are not listed such characteristics as stability and sensitivity; rarely specified accuracy. These devices are not entered in the register of measuring instruments, their characteristics are not confirmed by certificate, they do not require periodic calibration and verification. In fact, the adequacy of indications of these devices remains completely on conscience of the manufacturer and can vary not only from model to model, but also from one instance of device to another.
Thus, in the initial stages of learning NOF possible to use widely available evaluation instruments to identify ways of further research, but it also needs to be a special approach.
First, as with the use of measuring instruments, separate instruments for laboratory and field. To each of these groups must meet certain requirements, directly derived from the operating conditions of the devices.
Second, choosing an evaluation instrument, it is necessary to compare all available models and choose the closest in characteristics to the same measurement.
Thirdly, you must strictly adhere to the conditions of the device.
In the case of the study of the phenomenon for submission of results to the scientific community all experiments should be carried out on the measuring equipment.
Translated by «Yandex.Translator»
Log in or register to post comments
